OAuth Tokens
DataZen supports the creation of Bearer Tokens for SaaS services that require such tokens. Some services require client-flow authentication to authorize DataZen to generate such tokens. The OAuth Token Wizard supports client-flow authentication in addition to generating the necessary tokens, including Refresh Tokens when available.
Step 1: Service & Client Flow URL
The first step is to specify your API / Cloud service.
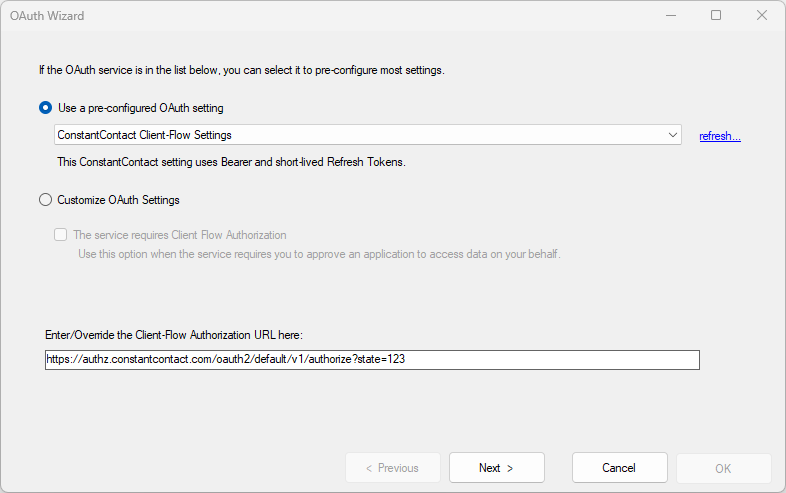
If the service is listed in the Pre-Configured OAuth Setting list, select it. If not, click on the Customize OAuth Settings, and if the service uses client-flow authorization, check the This service requires client-flow authorization checkbox and enter the Authorization URL provided by the service.
When you choose an existing service definition, the settings in the following pages are also pre-configured for your based on available documentation. However, the default settings can be modified if necessary.
The following HTTP/S services available with pre-configuration include:
- Business Central Online
- ConstantContact
- Criteo
- DayForce
- Google Cloud
- Instragram
- MailChimp
- Business Central
- Microsoft OAuth
- NetSuite
- QuickBooks Online
- YouTube
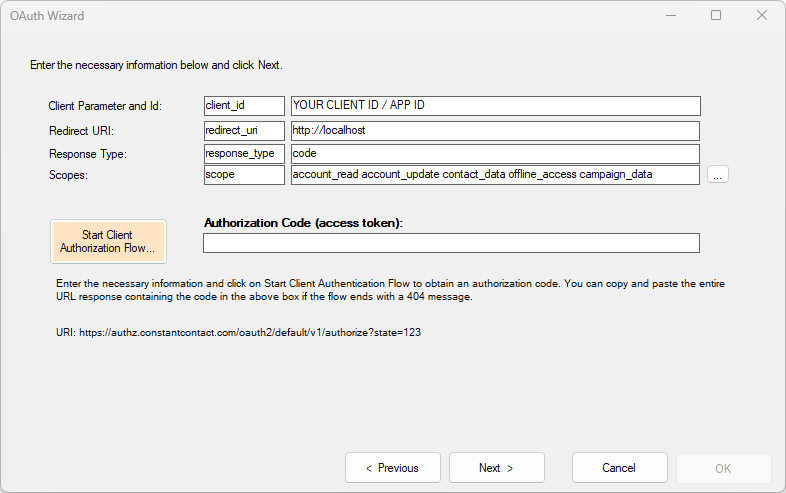
Step 2: Authorization
With Client-Flow Authorization
If the service requires client-flow authorization, this screen will show you the input required to obtain a short-term code before you can generate a Bearer token.
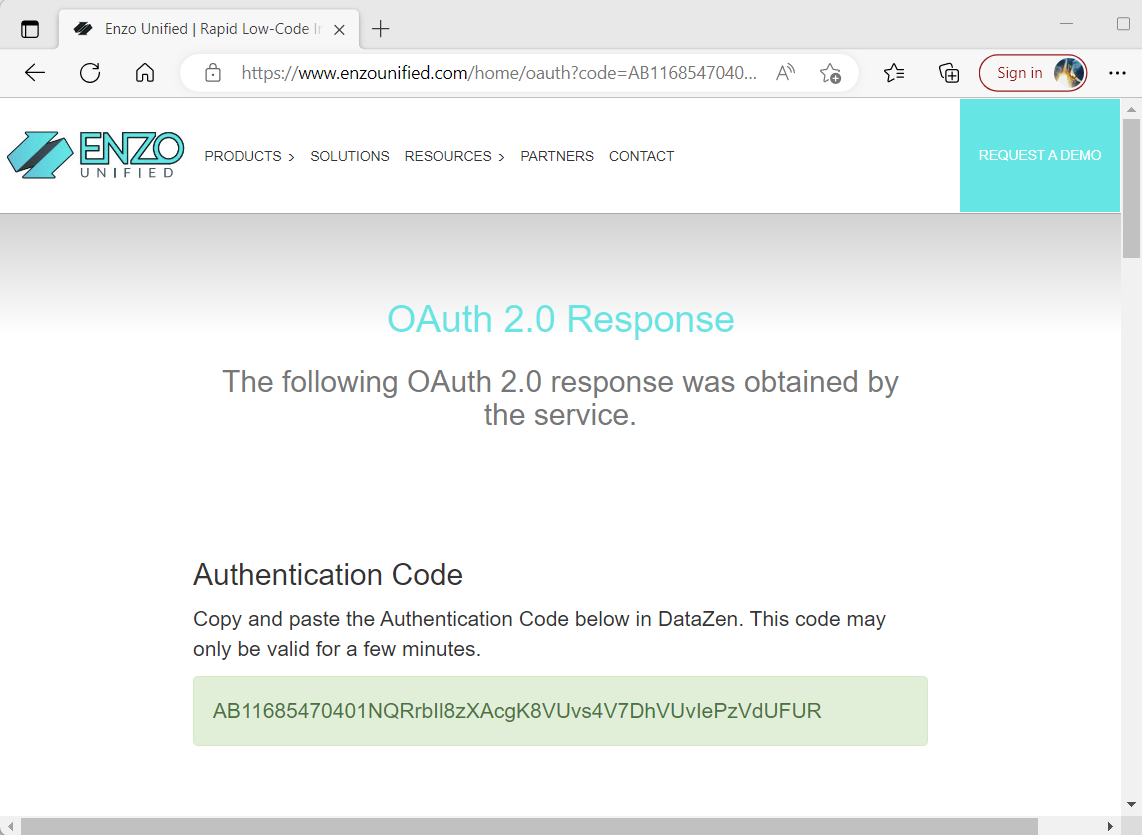
When using https://www.enzounified.com/home/oauth as the Redirect URL, you will see the authorization code on the Enzo Unified website:
Client ID
Enter your Client ID (or sometimes also called Application ID or Company ID) in the first row. The name of this paramer varies depending on the service; in this example using ConstantContact the parameter name is client_id.
Redirect URI
This URI must match exactly the information expected by the service; in some cases https:// must be used. DataZen automatically starts a listening service in the background using the URL provided. If no trailing '/' is added, DataZen will listen on a random port. However, adding a '/' at the end (ex: http://localhost/) forces DataZen to listen on port 80 (or 443 for https). This HTTP listener will attempt to inspect the response provided by the authorization call and automatically extract the authorization code.
Scope
Some services require specifying scopes. In some cases, scopes are separated by a space, and sometimes a comma or semi-column. See the service specification to know which one to use. When using a pre-configured OAuth setting, this is done automatically.
Click the Start Client Authorization Flow... button to begin the authentication and authorization flow.
When a code has been received or entered, click Next.
Without Client-Flow Authorization Code
If the service does not require client-flow authorization, this screen will show you the input required to identify your account.
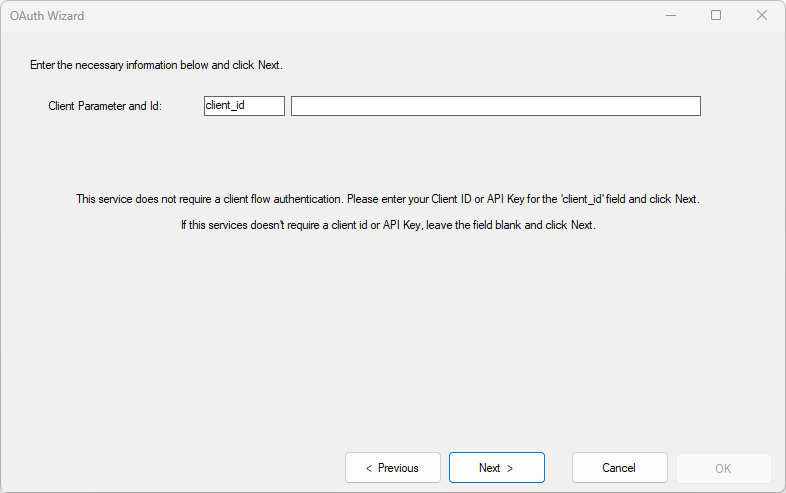
Client ID
Enter your Client ID (or sometimes also called Application ID or Company ID) in the first row. The name of this paramer varies depending on the service.
Click Next.
Step 3: Bearer & Refresh Token
Finally, this screen allows you to obtain or reissue your Bearer & Refresh Tokens.
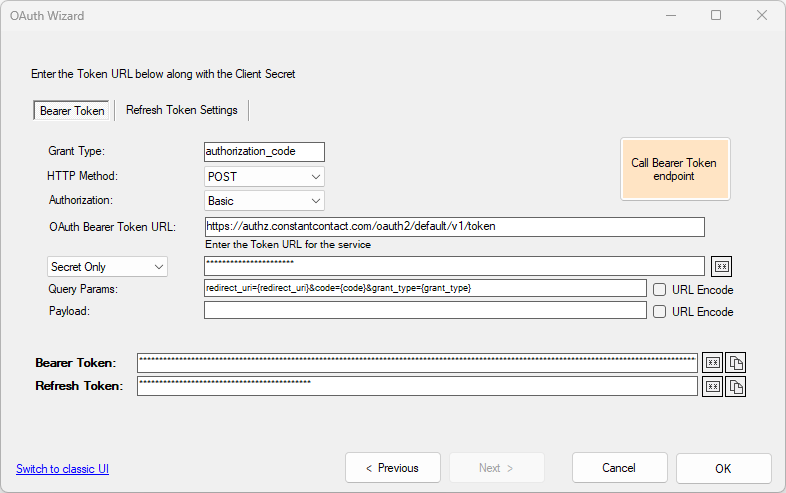
/token endpoint. This endpoint
is normally used to generate a Bearer Token. In some cases, calling these endpoints will also generate
refresh tokens, in which case you should also configure the information in the Refresh Token Settings tab.
To generate the bearer token, or regenerate it, click on the Call Bearer Token Endpoint button. If successful, the bearer token will be filled in automatically at the bottom of the screen in the Bearer Token field.
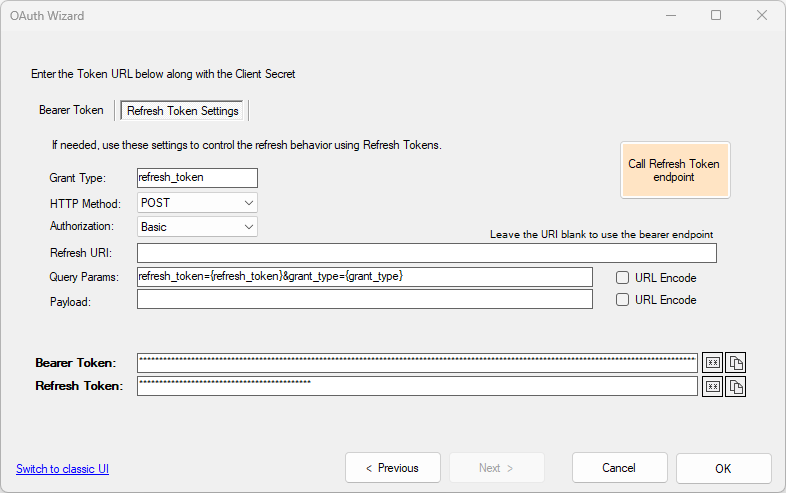
Use the Call the Refresh Token Endpoint button if you already have a Refresh Token specified, and the Bearer Token has expired. Note that this is normally not required since DataZen automatically calls the Refresh Token when required. This button is normally used to test that the Refresh Settings are entered correctly.
This screen allows you issue Bearer & Refresh Tokens the first time. If a Refresh Token is already available and you want to reissue your tokens, click on the Refresh Token Settings tab.
When the necessary information is entered, click on Call Bearer Token Endpoint to obtain the Bearer Token; the Refresh Token will also be retrieved automatically if one is available. If no Refresh Token is issued by the service, you can ignore the Refresh Token Settings tab.
The settings provided on this screen are provided by the service and are pre-configured when you choose an existing OAuth setting. If you are using custom settings, you will need to inspect the service documentation for details.
Authorization
Some services require Basic Auth authentication when calling the Bearer Token endpoint.
OAuth Bearer Token URL
This is the URL that will be used to issue the Bearer / Refresh tokens.
User Id and/or Secret
Most services require a secret to be provided. In some cases, and additional User Id is required, separate from the client_id provided in Step 2. If so, choose User Id and Secret from the dropdown.
Query and Body
Depending on the service, a query and/or body must be specified. A number of parameters can be used as provided so far:
- Step 2 Variables:
- {scope}: the list of scopes provided in Step 2
- {redirect_uri}: the redirect URI entered in Step 2
- {code}: the authorization code obtained in Step 2
- {client_id}: the client_id value provided in Step 2
- Step 3 Variables:
- {grant_type}: the value entered in Grant Type
- {user_name}: the User ID provided in Step 3, when using UserId & Secret
- {client_id}: the client_id used for Basic Auth
- {client_secret}: the Secret provided in Step 3
- {token}: the Bearer Token (simetimes needed for reissuing tokens)
- {refresh_token}: the Refresh Token (simetimes needed for reissuing tokens)
- {scope}: the list of scopes provided in Step 2
- {grant_type}: the grant type to use as specified in Step 3
- {code}: the authorization code obtained in Step 2
- {jwt}: a short-lived token used to obtain a long-lived token
- {redirect_uri}: the redirect URI entered in Step 2
In addition, a few DataZen functions may be used as part of the OAuth request in the payload or URL:
- {#rndguid()}: Generates a random guid
- {#timestamp()}: Generates a unix timestamp value in seconds
- {#timestamp_ms()}: Generates a unix timestamp value in miliseconds
- {#utcnow()}": Returns the current date/time in UTC using the default formatter
- {#utcnow(o)}: Returns the current date/time in UTC using the "o" formatter
- {#utcnow(r)}: Returns the current date/time in UTC using the "r" formatter
- {#utcnow(g)}: Returns the current date/time in UTC using the "g" formatter
- {#utcnow(G)}: Returns the current date/time in UTC using the "G" formatter
- {#utcnow(s)}: Returns the current date/time in UTC using the "s" formatter
- {#utcnow(f)}: Returns the current date/time in UTC using the "f" formatter
- {#utcnow(F)}: Returns the current date/time in UTC using the "F" formatter
- {#now()}: Returns the current date/time using the default formatter
- {#now(o)}: Returns the current date/time using the "o" formatter
- {#now(r)}: Returns the current date/time using the "r" formatter
- {#now(g)}: Returns the current date/time using the "g" formatter
- {#now(G)}: Returns the current date/time using the "G" formatter
- {#now(s)}: Returns the current date/time using the "s" formatter
- {#now(f)}: Returns the current date/time using the "f" formatter
- {#now(F)}: Returns the current date/time using the "F" formatter